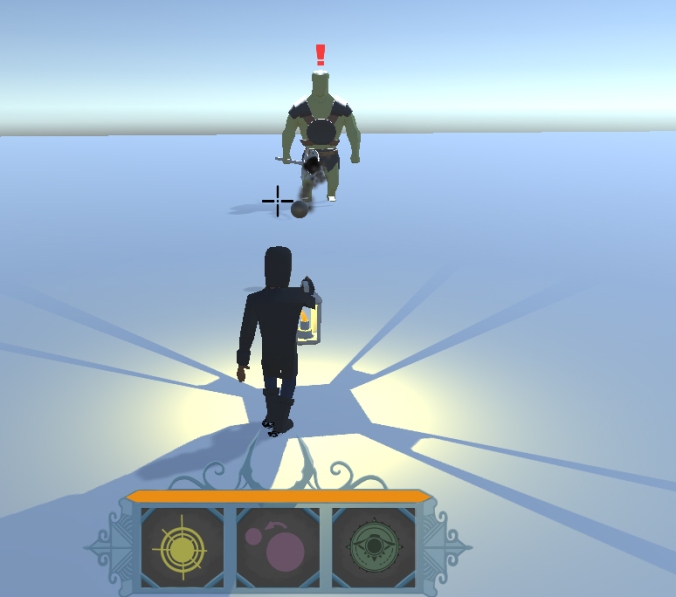
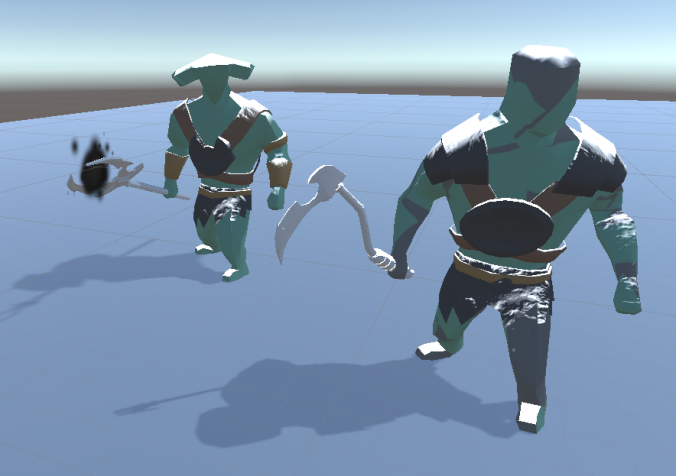
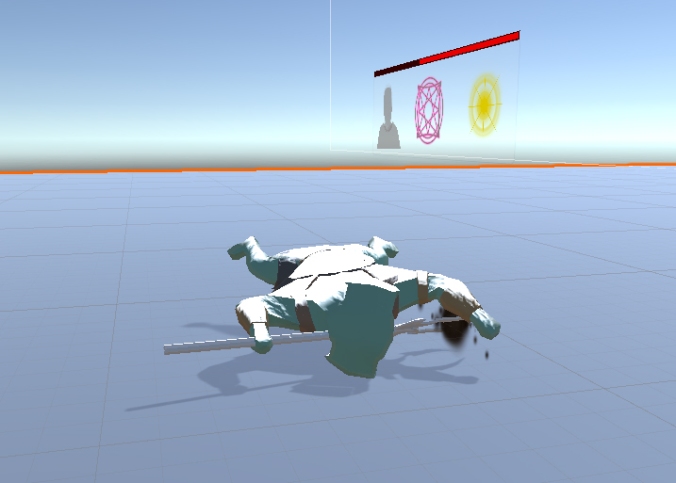
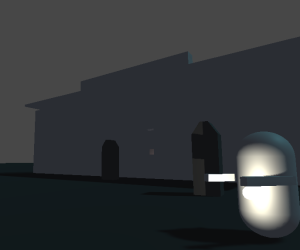
[DEV & ART] Backstab & Teleport effect added. Lvl 2 & lvl1 reworked. Small changes
Backstab & Teleport Die effect
When shielded enemies are hit from the back they display a backstab particle effect.
Teleport now has a dying effect.
Lvl2 begin area reworked & Lvl 1.


Small Changes
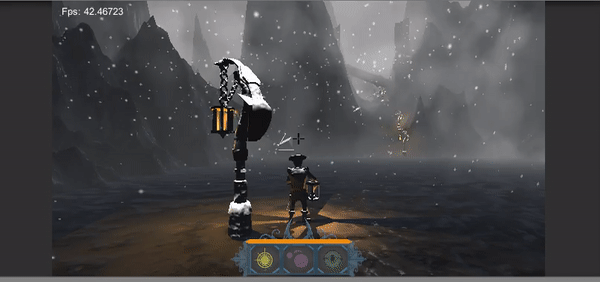
Lantern color changed & lantern bullet follows now the color of the lantern.
Intro & outro fixed.
Player can break out of stealth mode when activating other abilities.
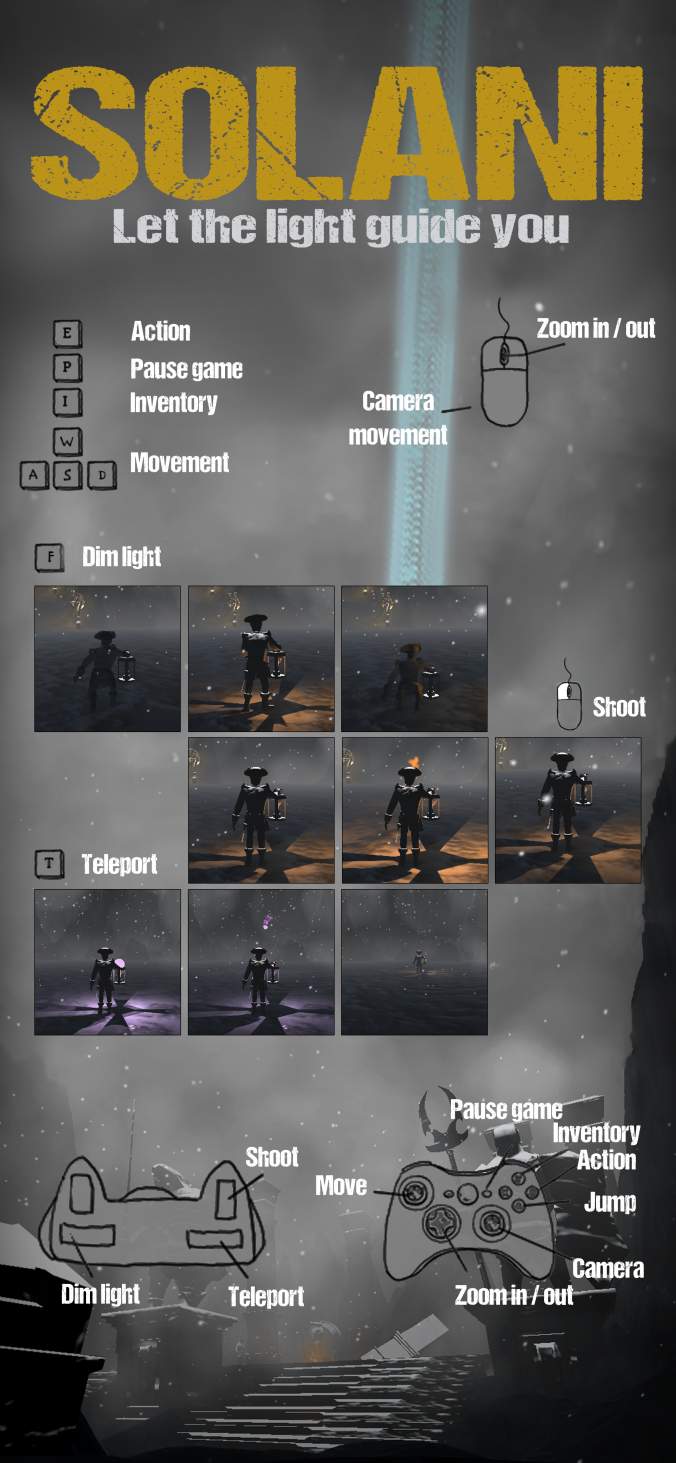
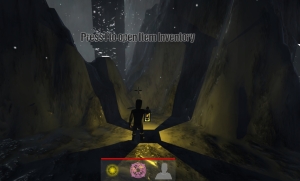
[DEV & ART] Final: UI + Hide + Smoothing

• UI:
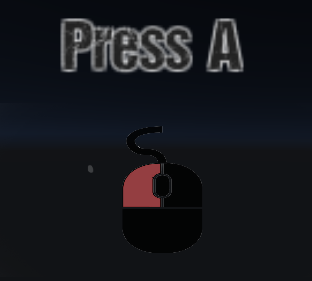
– New Mouse Image when Enlight is learned (better readability)
• Hide:
– Player can break out of his hide when the player shoots or teleports. (animWise)
• Smoothing:
– The camera sensitivity for gamepad is adjusted. (adjust at start no longer needed)
[DEV] Enemy Final Tweaks & General Bug Fixes
Since our games was almost finished after the update of 23 may, all there was left to do was tweaking values and fixing bugs.
Enemies
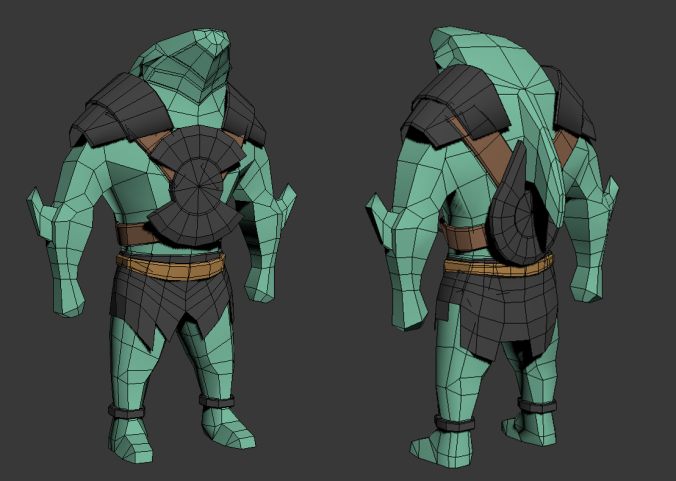
– Shielded enemies are now visually updated to have particles spawned when backstabbed (Particles made by Michaël).
– Color of the Question Mark when losing sight of the Player is now a darker shade of yellow.
General
– Menu navigation with Controller is no longer receiving double input, pressing a button now works as intended.
– Menu now has a back key in combination with a back button (B on Keyboard, B on Controller), so that navigating to the back button is not required
– Navigating in Menus on Controller now uses the same Input as in Inventory (Joystick instead of D-PAD)
[ART] Animation Tweaks. Project Poster
For our final touches we changed up some animation to better fit our game.
On of these animations is our crouch animation ( used for the hide ability )
The changes can be seen in the following .gif.
As part of the end assignment we needed a poster ( with display of goal, controls etc) to market our game. This is what we decided upon.
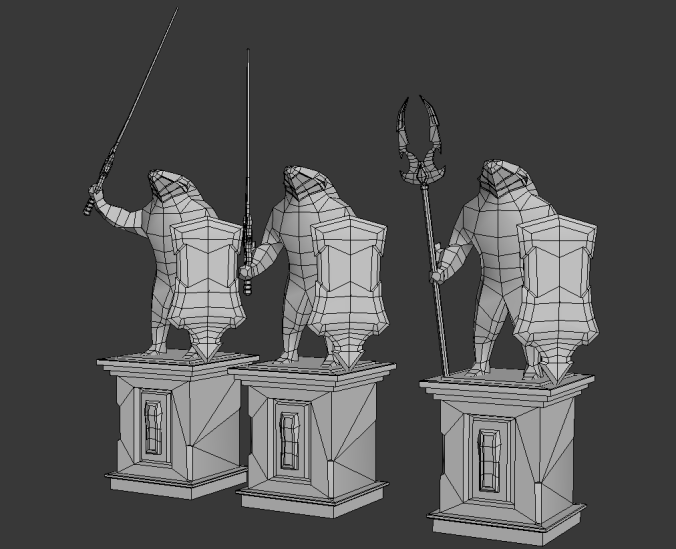
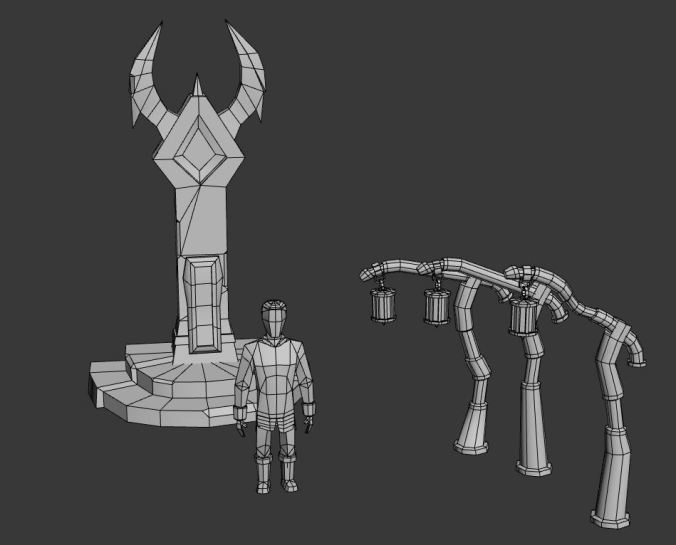
[DEV] New Enemy type
With the enemy devided into multiple scripts we also changed how we select our enemies. A generator script and one prefab allows us to easily pick the enemy we want with the desired abillities, this all thanks to developer Quinten.
All these changes caused some bugs and erros but they could be resolved .
Alongside these major changes we also have a new type of enemy. 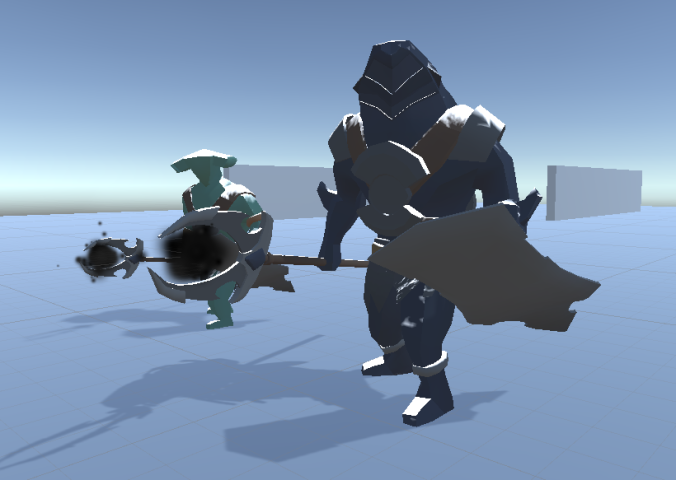
The new model, thanks to our artist Matthias is a bit different than the other two but still fits the same genre as the other two.
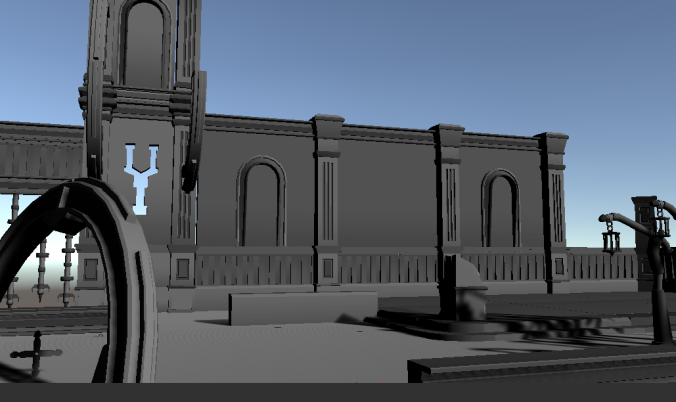
[ART] Texture Atlas & Models
The previous week i’ve been busy with retargeting the modular kit and other assets to an texture atlas; This was done so that we could get rid of the default grey and replace it with gradients ( as was planned out in our artdocument).
Another reason for using an atlas would be to save performance.
The folllowing image shows some of the modular pieces with the applied atlas.
There were also some more models created to fill in our environments and create a story.
The following image represents our third enemy ( see previous post) in all his glory and fame.
[DEV] New + better PlayerAnims and structure
Video’s :
Animations:
– Player no longer walks but is now running through the levels.
– Player doens’t go instantly to the fall animation after jumping only when high enough above the ground
– Hide Animations is fully implemented now.
[DEV] Clipping Fixes
When introducing the colliding camera, we had no smoothing whatsoever. This meant that, when colliding with the irregular terrain, you’d get a shaking camera, which is not what we wanted. Later on we’ve added some smoothing, but we forgot to test whether or not this worked well on the Terrain.
When Michael accidentally forgot the terrain tag in Level 3, we noticed this issue from earlier was actually fixed, so this helped us fix the terrain clipping we had earlier.
Also, because our FPS is less terrible right now, we can set the occlusion a bit less harsh, which meant we could tweak the near plane from our camera without having clipping issues.
This way, there seems to be no more clipping terrain planes anywhere in our game, which will increase the immersion effect.
[DEV] Enemy Rework
Enemy Script
The enemies have been a struggle since the beginning, with a script that kept growing in size, the bugs kept appearing whenever something was changed.
Therefor, Brecht, Nick and I have been sitting together to rework the entire script. It has now been divided into smaller scripts that define the behaviour of the enemy, depending on its type (i.e. Ranged or Melee, Shield or no Shield, Patrol or Guard). This increases maintainability and readability by a lot, and writing the script from scratch gave us more insight in where each bug might be coming from.

Enemy Generator
Since there are 3 enemy models, each with 3 possible weapons, and the option to have a shield, creating a prefab for each type would clutter our prefab list. Therefor, I’ve created a script which allows us to easily generate a different enemy model in edit mode.
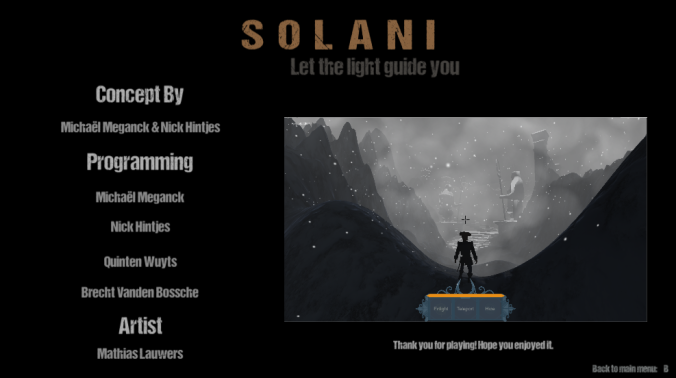
[DEV & ART] Outro and Credits screen, Levels Refactored
Outro & Credits screen
When a player finish the game an outro is being played and the credits screen is being showed.
Levels Refactored
Level 3 has now been finished and the other levels have been adjusted with new statues, meshes and terrain work.


[DEV] SmartEnemy (cheap navigation) + little tweak hideAnim
This Week I tried to improve the enemy smartness, this is just a start and is not in the current build.
–Changes–
*Enemy:
Enemy Follows u if the player hides behind a wall.
Enemy Goes back the same way he followed u so he does not collide with the terrain anymore (not 100% working yet)
Enemy Stores Backpoints when he sees u. (so he can return easily)
SafetyCheck if for some reason on his way back he gets stuck the enemy will search for an available point next to him so he can run the rest of his remaining path.
*Player:
When start of hide anim player crouches for a second -> next week player will stay in crouch untill hide anim is done.
—–
[DEV] Enemy awareness(start)
Our enemies are almost complete but their are still some challenges to overcome. The biggest one is making our enemy aware of its surroundings and make the enemy more agressive. Because we don’t use navigation meshes this is not an easy task.
We , being developers Brecht and Nick are trying to overcome this challenge.
The goal is to make our enemy smart enough to try and see where the player went when visual contact has been lost.

Their was also a bug where it would look like the enemy had lost sight of you but was in fact still attacking. This bug and two small others have also been fixed.
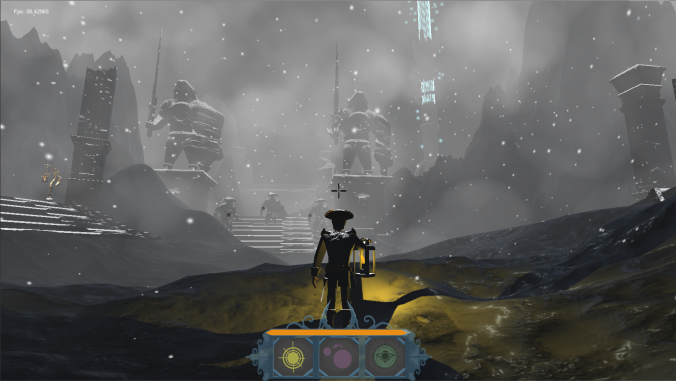
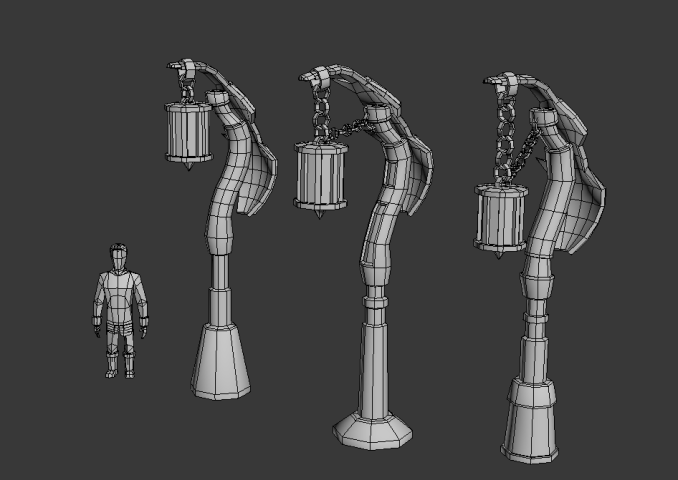
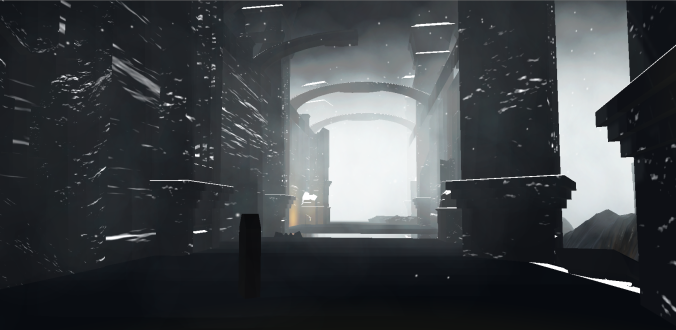
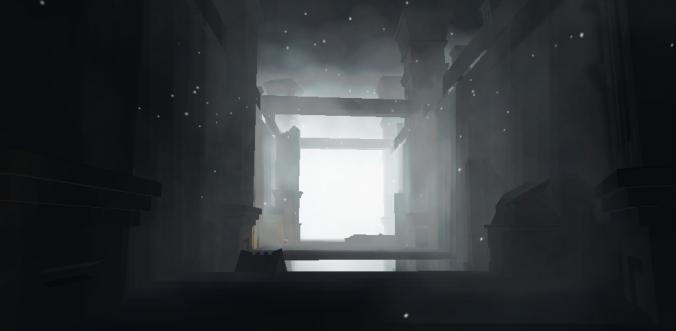
[DEV & ART] Loading Screen, End Pillon and Level 3(WIP)
Loading screens between scenes.
For more player feedback between the loading of the levels i made a loadingscreen. This loading screen can display some tips & tricks so the player never has the feeling of having to wait for the new level to load.
End Pillon
The end pillon also has been updated with a particle effect to simulate a morebeam of lights going up ( a more portal feeling).
The snow system also has been updated.
Level 3
I also started to make a third level of the game. In this level we are going for a more city like feeling of narrow streets, running arround roofs and exploring houses for components.

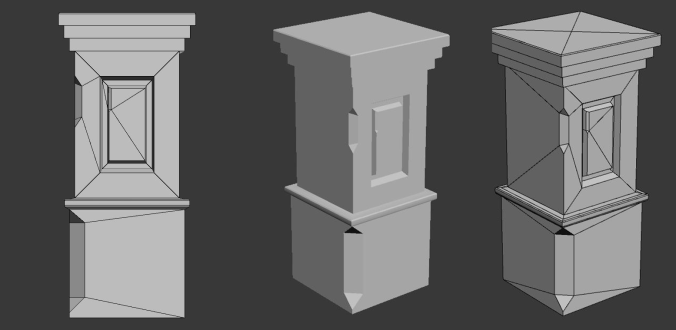
[ART] New Models
We realised we could use another enemy type to create more diversity throughout our levels. So I’ve crreated another ( and slightly bigger) enemy to join the hostile forces.
Just like all the other enemies he’s based upon a sea creature and morphed into an humanoid form.
Another workingpoint of this week was to break up the silhouette of our player ( specificly the backview) to create a more interesting view to look at while playing.
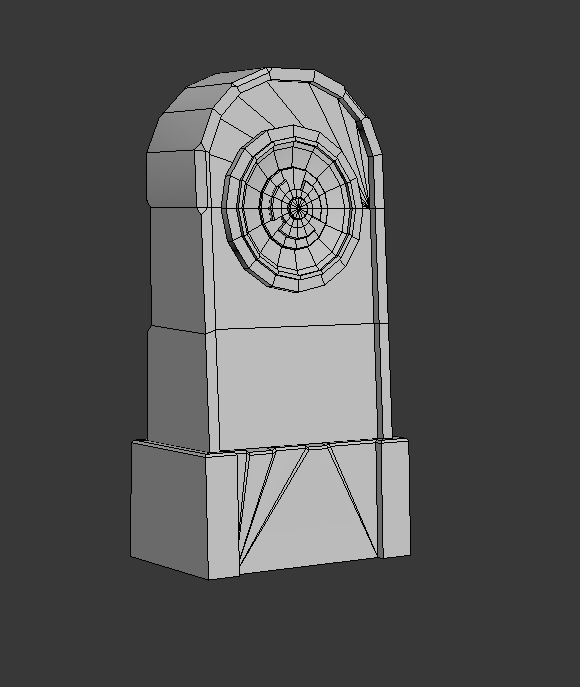
And last but not least; another pillar was created based upon the ancient cultures.
[DEV] Camera Cutscenes
Last week, I’ve been working on auditory feedback for the Player, adding sound effects to as many actions as possible. However, it is not guaranteed that the Player will be playing with sound on. Therefor, having auditory effects alone will not suffice. Visual feedback is always required, and sounds are just there to complement this.
One of the key things at the very start, is that the gate opens when you pick up the lantern. This was not always as obvious as we thought it was. People struggled getting past the first part. Therefor I have now added a system in the Camera where you can start a Cutscene. This will move along a path, set by waypoints, over a specified duration.
Although the path isn’t automatically curved like bezier curves would do, it is still capable of creating a decent cutscene when the waypoints are placed correctly.
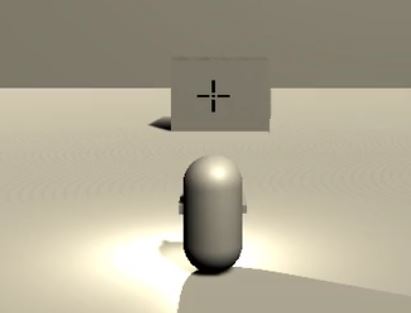
[DEV] StartUp Crouch Animation + new Enlight UI

Little post this week:
When the Player will be in Hide mode a new animation is played.
The player will also move a bit slower.
When the Player has Learned Enlight the image is no longer a keyboard but a mouse showing the left mouse button so it doesn’t confuse the player anymore
Helped with Brecht this week as well for all enemy bugs, cuz that was main priority.
[DEV & ART] New Inventory, new lever, healthpickup and level editing
New Inventory
The inventory has been updated visually to be more player friendly. The equiped items now have a orange border arround them. Each component has unique stats and when u hover u see the new lantern stats with + (green) or -(red) when u would equip this item. The inventory navigation now also supports up/down movement so now u can browse your inventory with the move keys. Each component also exists in 3 different tiers(grey-red-blue, blue the strongest tier) so the player wants all blue parts depends on the playstyle.
With this new inventory the code behind also changed alot. Code has been seperated in logic and view of the inventory and more modular methods have been added.
New Lever
(with sound)
The normal press button wasn’t clear enough for the player so we changed the lever mesh and added a visual and audio feedback for the player.
New Healthpickup
For more player feedback we added a new player healthpickup. The mesh and partical system make it more clear of what it actually is.
Level editing
Level one and level two have been readjusted so the both levels are playable now.
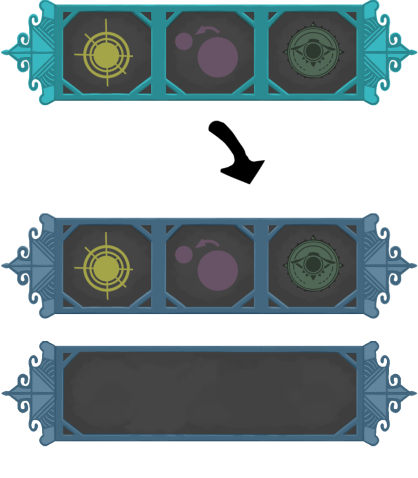
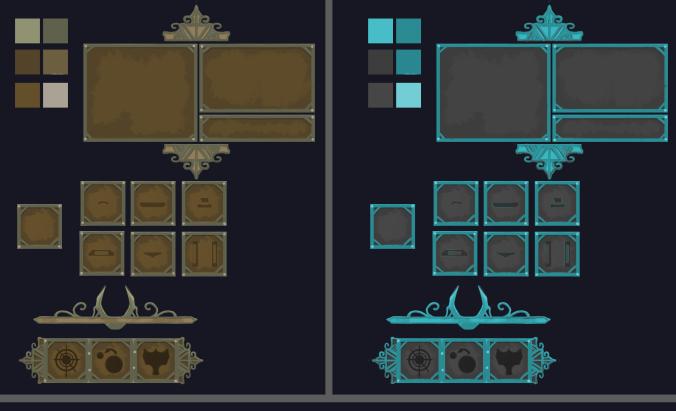
[ART] Recolour of UI & Models showcase
We decided that the UI needed a shift in colour to prevent extreme popping against certain backgrounds. We decided upon a more saturated blue colour to blend in more with the grey environments. The following image is an exemple of this.
Here are also some new models made and imported inengine from previous that are used all throughout the levels to create more interesting environments.
[ART] Menu Visual Updates
Up till this point, the menus existed of standard Unity UI visuals, which didn’t fit our style.
This week I’ve updated these visuals, using the images our artist Mathias made for us. Using slicing, I can easily adjust the size of each window, without stretching the corners, if this is later needed.
I also updated the Colors of selected items, to make them pop out a bit more and make them fit the updated colors more.
A toggle for the FPS Counter was also added.
[DEV] Sound Improvements and New Additions
Sounds
Last week I added the basics for the Sound Manager, and added a few simple sounds to demonstrate this.
This week I’ve improved the script a lot, adding functionalities such as fading in and out, and 3D sounds. We now have added almost every sound that the game requires. These can easily be changed if we find a better fitting sound later on.
The boss fight now has its own background music, which creates a more tense atmosphere and really elevates the boss-fight-like experience.
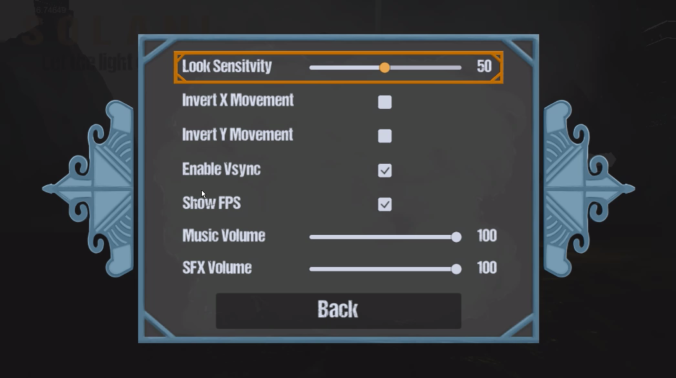
Settings
Other than that, sounds now have their own volume (split in two groups: Music and SFX) which can be adjusted to your preferences in the Settings menu.
Since these have to be altered with Sliders, and moving the sliders around with buttons felt really slow, I’ve added an overriding script for the slider handler, that now moves the slider faster the longer you hold down the button.
[DEV] Enemy detection feedback + bugfixing
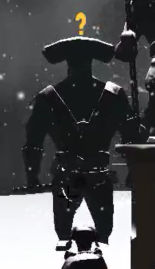
To create more player feedback the enemies have been given images for when they detect you and when they lose sight of you.
A red explanationmark for when detected and a yellow question mark for when lost.
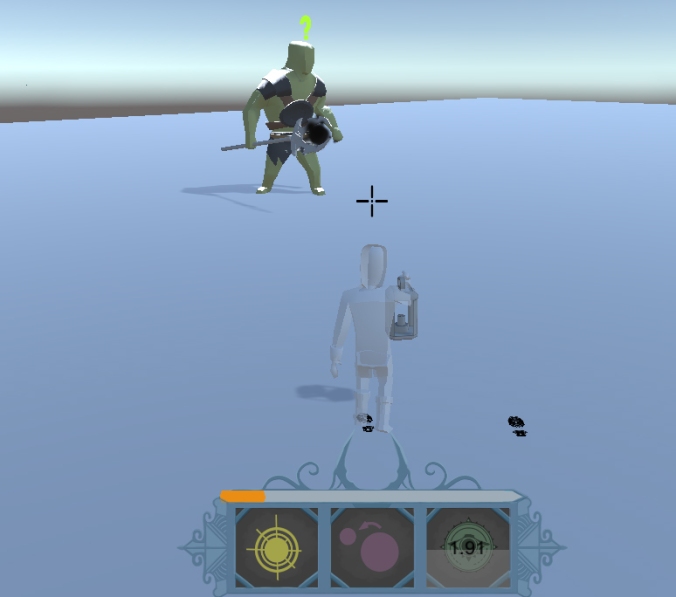
Together with developer Nick we fixed some bugs who were causing trouble with the player detection system.
The enemy would suddenly lose sight of the player, even when the player was just in front of him. This bug was caused by the projectile the enemy fired blocking the raycast. This was fixed by using a layermask and so ignoring the projectile.
The melee attack now performs the entire animation before checking if another attack can be done, this fixed a bug where you could run away before the attack was completed.
A special thanks to developer Nick for helping with these fixes!
[ART] HD UI assets
This week we recreated our ui template in a more HD resolution so that it can be used in game.
The following images are some examples. More can be found in our build itself.
We decided to go with our ‘neon’ blue colourscheme to create contrast.
[DEV] Footsteps
Footsteps have been introduced in Solani a while back, but they were using magic numbers and inefficient code.
Adding Sounds was simply impossible since the footsteps didn’t match with the actual foot positions of the Player. This was not so visible, thus not so important when only the footprints were there, but when adding the sounds, it become too obvious that something was wrong.
Spawning
To fix this, I had to figure out a way to find out if the foot of the Player, that was attached to one of the Bones, was touching the ground. Since his feet are animated, they don’t always touch the ground perfectly. Calculating the difference between the hips bone and the foot bone actually gave us a result that looks right in almost every case.
Rotation
Also the rotation had to be taken care of. The print has to be aligned with his foot, but also be parallel with the ground. Using some raycasts and cross product maths did the trick.
Pooling
Since instantiating and destroying the footstep objects every time is a very heavy operation, I added pooling to optimize this simple script. Hiding and unhiding these GameObjects is way better performance-wise.
[DEV & ART] New Fog System, Inventory visual update and New Level Two
New Fog & Inventory
Previous Builds we noticed a fps drop. Clearly we had a bottleneck but we didn’t know where it came from. After alot of testing we discovered the bottleneck. It was the alpha blending from the fog system and the system itself.
We created a new fog that is smaller and faster to run. More structure and on several pc’s we had a fps boost of 10-20 fps.
Inventory also has been restructered to improve player feedback.
Level Two
We also made a new level to explore more from this universe. We tried a more temple/city environment without losing our general atmosphere.

Guidelights and checkpoints have also been updated.
[DEV & ART] New Player Animation + Skill HUD Update
Player Animation
(see movie + pic below)
-Different animations played when the player is walking with or without his lantern.
-dying animation + a falling animation when he doesn’t hit the ground quickly.

HUD update
-LiveBar: no more red but yellow shows his health, no simple quad but a nice texture.
-Cooldowns: new cooldown texture but used same as previous.
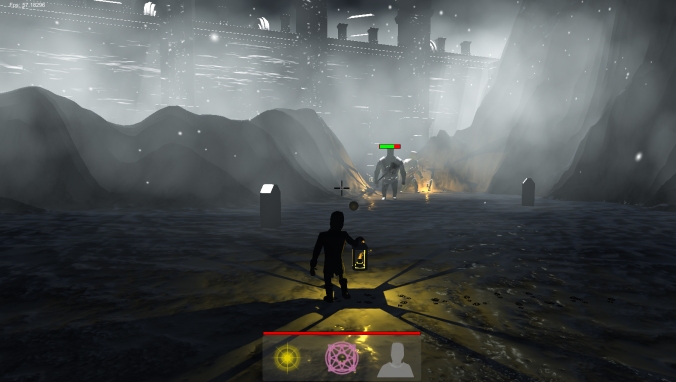
[DEV] Enemy update
The enemies now have a melee attack and dying animation resulting in a more real combat experience. The melee enemy now stands apart from the regular enemy with his new weapon.
The new animations: Melee and dying


There have been also some changes to the code. A gravity bug has been removed and some loops have been optimised.
[DEV] Health & Inventory
Inventory
When the First Item is Picked Up the inventory no longer suddenly pops up.
The player can now go to the Inventory by himself. A little text is now displayed to show how to go in the inventory.
Health
Visual Bug is Fixed Health no longer goes Below 0.
[ART] Models & UI concepting
This easter holiday we continued refining our assets to be used ingame.
Below can be found the new model of our ‘ability pillar’ and some mesh variations of our guidelights.
We also started working on creating a uniform UI for the player.
Our preference goes out to the blue variant. Due to it creating a better contrast with out game environment but still blending in.
[DEV & ART] New Main Menu and Level One
Main Menu
A new main menu was made. Instead of the 2D menu we switched to a 3D menu to let the player experience the mood and atmosphere of the game before even playing the actual game itself.

Level One
A new starting level was made with new assets from our artist Mathias. The level has been designed to give a more exploration feeling but without the risk that the player can get lost.
Also we introduce the lantern abilities a bit slower so the player can get familiar with them before the game gets harder.


Small Dev changes
Tp ability has been improved so the player cant get out of the map so easily.
Game Manager adjusted for the async loading.
[DEV] Sounds
[Note: Video has sound!]
During the holidays I’ve been looking into how to make a system that can play multiple sounds, can be accessed from all scripts and is easily maintainable.
To achieve this, I’ve made a manager that has a list of Audio Sources. These can be easily added and tagged, so they can be accessed through some simple functions in the script.
Since the manager is a singleton, this will also ensure that there’s always one and only one manager present in the scene.
I also added a functionality to pick a random sound if multiple sounds with the same tag have been added. This is often done in games to create variation for very repetitive sounds, such as footsteps, hurt sounds, and so on.
All there’s left to do to have all the sounds in our game, is to find or make them, add them to the manager, and call them in the corresponding scripts.
[DEV] Enemies Easter update
During the easter holiday our artist updated the enemies with new weapon meshes, the healthbar also got a tweak and the actual image will later be updated.
Along with positionprediction the enemies now have a spread factor that will function as an errormargin for shooting, this will make the combat a little more unpredicting.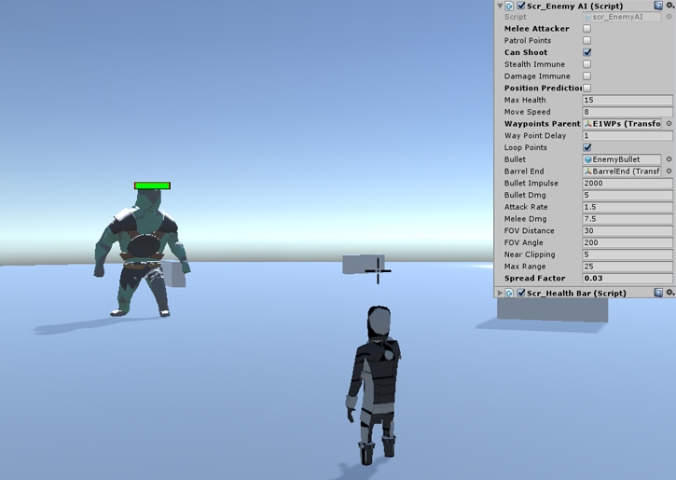
Now the focus will be to make sure the combat remains fluent ,make sure the enemy doesn’t get stuck in certain positions and make the enemy more aggressive and challenging.
[ART] Asset Example
We created an example asset to help us create a consistent world.
This can be found either in our document section [Art outline] or by following this link :
image preview of the asset:
[DEV] Enemy Animations + Hide Edit
Enemies
-Smarter (see Brecht his post for more info about this)
-Animations (they have a basic idle animation and run animation)
Hide
-when the player wants to hide an animation is played.
-the player can not move during the animation.
-when the animation is over then the player will be invisible for some enemies
(not for the enemy in the video as u can see).
Not in the video
when the Lantern is picked up at the beginning of the scene a little short cutscene is played now. (same as when u learn an ability)
[DEV & ART] Occlusion Culling, Falling Snow & Level Update
Occlusion Culling
To further optimize our game we decided to use occulusion culling. After the frustrum culling(throw away anything outside the camera frustrum) occlusion culling throws away additional meshes that are inside the camera frustrum but that the camera(player) can’t see. This reduces the draw calls and overall polycount that has to be rendered. The effect is strong when u have large structures like mountains and walls that really block the view. The occlusion is baked occording to the data from the occlusion area’s.
 Green boxes are the occlusion area’s (unity editor)
Updated Snow Shader
The snow shader has been applied to all our materials in the scene helping unity to increase batching and reduce draw calls which enhance performance.
Every mesh gets the snow shader script and in this script you can adjust many parameters. Falling snow and duration has been added.
Level Update
New meshes and snow has been added to the level.
[DEV] Improved Combat
To make the enemy more challenging we have given them the abillity to predict the position of the player. The older attacks could easily be evaded but with this abillity the combat gets a little more dynamic.
There have also been some changes in the behaviour of the enemies and together with developer Nick a rotation bug has been fixed.
For now the focus will be to expand the protocol when the player is no longer in sight.
The enemies have received a model upgrade and their own animations thanks to our artist Mathias and developer Nick.
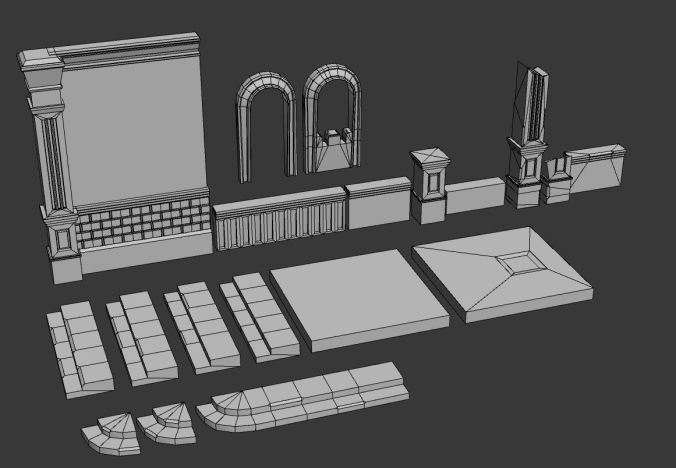
[ART] Expanded Modelkit
This week progress was made in form of expanding the modular ruin kit. The mising pieces were added and some more variations were made.

The following images show a in-engine testscene to preview what is possible when combining the meshes and even re-using them for other purposes.
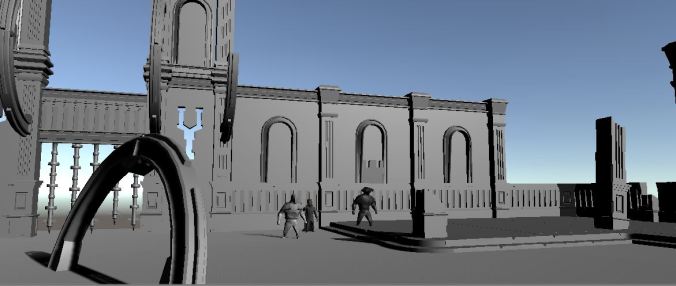
Repetitive wall elements can be broken up by shoving other meshes in them or simply using one of the variations.
[DEV] Save Between Scenes
When completing level 1, you enter a new scene that represents level 2. Since unity unloads level 1, and level 1 and 2 are not synced, we needed a way to save everything that we needed to know from scene 1 and apply that to scene 2.
This can be done by saving all the variables to our GameManager, since this manager does stay loaded, and load the variables back into the corresponding scripts. This way we can keep our Inventory the same, which means your stats from level 1 will be saved when going to level 2, just like you keep your learned abilities and Spawn Position.
It was necessary to save the variables, so that we could later write a Save file that’s stored locally, which would allow the player to continue from where he last left the game. Saves won’t occur regularly though, only predefined checkpoints and the transition to a new level will be seen as a point where the player information is saved.
[DEV & ART] Menu Updates 2
After having some people play with the new main menu and settings, I noticed it was sometimes not clear which element or button was selected. To resolve this, I added color options for UI Elements. It can easily change the color of all UI elements in the menus with a single defined Color. This way we can find a color that fits our theme and contrasts enough with the background to make it obvious which element is selected.
It also makes sure text remains readable when changing colors. Whenever a color is too bright, the text will change to a darker color instead of keeping the light one, and vice versa.
Since check boxes and slider handles are tiny buttons, changing color doesn’t make it pop out a lot. Therefor, I added a border around the setting that is selected. This border will be hidden when selecting buttons, since buttons are big enough by themselves.
[DEV & ART] Animations in Unity + UI Info
Animation
For this week Mathias,Michael and I worked on the animations in Unity.
Now we have basic animations for our Character.
The character can : walk,jump,pickup his lantern and hide animated.
UI
New this week is even more info once a new Ability is learned, the player gets a short display of how to use this ability.
There is also a better Info System when opening the inventory, the same way as when it’s learned a new ability some info is displayed but now on the Left side of the screen to show how to cycle trough the different Pick ups.
[DEV] Menu Controller Support
Since our Game needs to have Keyboard/Mouse and Controller support, creating menus with interactable UI elements isn’t as easy as usual. Clicking on a Button with your mouse is easy, but Controllers don’t have a mouse, nor are they able to control the Cursor. To fix this issue, I’ve decided to get rid of the Cursor entirely (Now always locked and invisible in the game), and instead select the UI elements using a Script.
Going through the different elements wasn’t as difficult as anticipated. Unity’s UI Elements inherit from a Selectable class, where I can get any adjacent UI element. It is then very easy to get the Input from your controls and look for the next element using that method. Controls are currently set as WSAD or Arrow Keys for Keyboard, and D-PAD for Controller. The submit key is X or Enter for Keyboard, and X for Controller. To change the values of a Slider, just simply have it selected (highlighted) and move left or right.
One issue that emerged from using these controls, is that Unity internally already does this selecting based on input. Since their axis is the same as ours, holding down any of these keys will make the highlight blink on the wrong button, or highlight a wrong button until you let go of the key. To prevent this, I had to manually overwrite the Colors depending on the selected element, instead of relying on the normal and highlighted colors that are defined the Button.
This also means I have to keep track of the last used button, so I can reset its colors when another button is selected. This gave me the opportunity to add a system that remembers which button you last pressed, which is convenient when switching from Main Menu to Settings Menu and back, for example.
[DEV & ART] New Fog System, Major optimizations and new Level Design
Fog System
The old fog system used a 2D image post processing effect the simulate the fog. Because of this we coudln’t really add depth to our fog and everything seemed the same fog color. Picture of old fog system
The new system consist out of a particle systems instead of 2D image processing effect.
The fog itself is made out of 3 parts: near fog, mid fog and the far fog.
The near and mid fog are world particle systems and the far is a local particle system. Each layer the fog gets denser and more lightweighted. The fog is also highly adjustable in comparison with the old fog.
Fog system viewed from unity editor.

Optimizations
During the fog test and the new level we noticed that our game had started to lag and run at terrible fps. Optimization was needed.
- Everything that can’t move-> static. (this allow unity static batching to kick in which basically unity makes larger meshes and fewer drawcalls are needed to render the meshes)
- To reduce draw calls en polygons we reduced the terrain quality en texture sizes + adjusted the camera far plane so less objects needs to be rendered.
- To stimulate static or dynamic batching as much as possible we also intent to use one material for as many objects as possible(snowshader, yet to be implemented)
After all these changes the draw calls and polyfons count dropped significally but we kept experiencing low fps. After many testing we found that webgl was being runned with our internal intel graphics card instead of our Nvidia ones. To test for yourself : chrome-> chrome://gpu/
firefox -> about:support
and check your graphics drivers.
Level Design with Meshes from Mathias. (Ingame screenshots)

[ART] Player animation & Modular kit start
This week our decided it was preferable to inplement player animation to create a more ‘natural movement’ instead of the gliding of the static mesh.
This can be seen best in our build.
Another focus was the start of the modular meshes so that we would be able to dress up our environments.
The most logical way was to work with multiple modular kits so that we can create ‘unique’ environments faster compared to modeling everything unique.
The folowing image is a breakdown of the start one of our modular kits (ruin kit).
All models should be snappeble to eachother seamless and be easiliy switched out to add diversity.
[Dev] Enemies
The enemies have gotten small improvements to their behaviour and some protocols have been rewritten. The enemies now have the abillity to look further than their normal viewing range when being hit by the player from long distances.
The enemy healthbar has also been fixed, the healthbar tended to get seperated from the enemy when turning the camera rapidly.
By checking if the enemy is visible by the camera(WordToViewport) this issue could be resolved. But this healthbar will eventually be replaced with a newer version.
The next goal is to make our enemies more challenging but still keep an eye on the performance.
[DEV] Camera Update 4
In the previous Camera, you’d often lose sight of your player because something was obstructing your line of sight, such as a wall or a pillar. To prevent this from happening, we needed some kind of Collision Check on our Camera, to see whether or not the view was obstructed.
To achieve this, we simple have to cast a ray from our Camera’s Look at position to our Camera Position, and the first hit point of the Ray determines the new Camera position. This method is very simple and works for most cases, but it needs some tweaking and optimizing in a few occasions.
One of the main issues is that the Camera will “jump” to it’s new position. This sometimes gives ugly Camera movement and should be avoided.
Another issue is when you’re looking along the side of a wall. This will allow “wallhacks”, since the Camera will partly exactly on the face of the wall, meaning the first part of the wall will not be rendered due to it being outside the near plane. The backside of the wall is backfacing, making it is also ignored during rendertime.
We also weren’t sure whether to add the Terrain itself as a collider for the Camera. The pro of using it as a Collider is that you don’t see random gray-ish planes in your Viewport because of the raw terrain shape (some faces will not be entirely backfacing, so these will still be rendered). The con is however, is that your Camera will “jump” a lot while sliding across the faces of the terrain collider. This will give the Camera a “twitching” effect, which is not really what we want.
We’ve voted to ignore the Terrain Collider when casting the ray, as the con was more obtrusive than the pro.
[DEV] Main Menu

Jumping right into the game once the game has loaded is never appealing in a Game. It surprises the Player, and that’s not something we want. We’ve added a Main Menu Screen to prevent this from happening.
The looks of the Main Menu are just a temporary placeholder until we created a decent background to fill the screen with.
In the Start Screen you’ll find a few buttons:
– New Game: Start playing in a new game (Currently the only supported way to start a game, since your progress is not yet saved)
– Load Game: Load an existing save file (Game will have checkpoints, this progress can be saved onto your PC and loaded in when you wish to continue playing)
– Settings: Open the Settings Menu. In here you can configure a few settings such as Sensitivity and inverted movement. This menu can also be accessed in game by pausing the game with ‘P’ (Keyboard) or ‘Start’ (Controller)
– Controls: Open the Controls Menu. This (currently) shows an image of the keybindings that you’ll need to know to play the game
– Quit: Quit the Game.
The Quit Button in the Pause Menu has now been replaced with a “Main Menu” button, which brings you back to this main menu screen.
This menu is currently only controllable with the mouse, just like the Pause Menu does. Controller support should be added by next week.
[Art & Dev] SkillLearning with new UI + HideMaterials + Font.
More PlayerInfo is added:
-When learning a new ability camera is rotated like last week but particles will now shoot from the pillar to the player itself to ‘learn’ the ability.
-When the player uses the Hide Ability the player becomes invisible using an other material then his own diffuse material so the player knows when he is invisible or not.
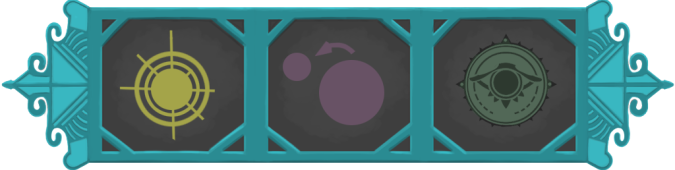
-The UI itself is no longer just circles,they are replaced with simpel icons that respresent the skill that has been learned.
-The game no longer uses the simple Arial font but now uses a new font that fits better in Solani.
[DEV&ART] Custom Snow Shader, Inventory Redesign, New Map & Visuals
SnowShader
To let our models blend in with our environment we decided to make a snow shader. The shader is a lightweight shader but is highly customizable and easy to use. With the shader their is a script where u can adjust all shaders params. So no more 100+ materials have to be made but every mesh can just use this script to enable the use of the shader.
scene rendered with snowshader but snow is off (only mat used is the snowshader)
scene rendered with snow on and every object uses different parameters. (only mat used is the snowshader)
Redesign Inventory
To make the inventory more player friendly and controller friendly. Everytime u access your inv the last selected item is selected and at the bottom u can see the stats of the selected part. Also u can see which part u have equiped with the blue circle. U can navigate through the inv smooth and easy and equip parts you want.Equiping a part changes the lantern stats which can be seen on the left side. Every part belongs to a certain type which is indicated by the horizontal color bars.(can be any color)
Terrain & Visuals
A new map was made to be more player friendly &allow the game to be played without being confused. Learning ability also has a particle effect to “see” the learning. Door script is also extended to support the triggering of the lever without any keypress.
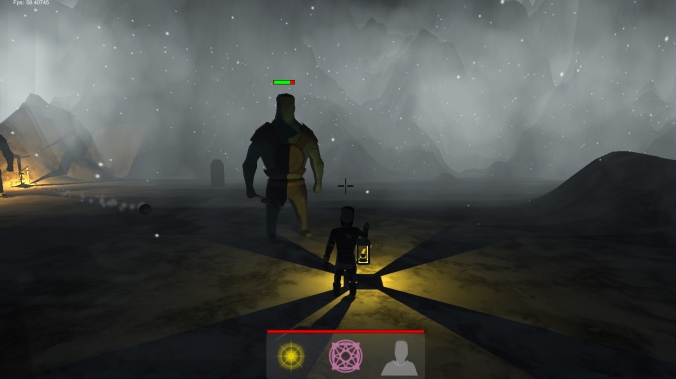
[DEV] Enemies Update
The enemies have gotten some changes in the code to improve their performance but the biggest change is of course the model.
The cylindrical enemies are gone and replaced by models provided by our artist and they are big, here is a size comparison between our player and the enemies.
The trident is their main weapon for melee and long range use ,in game it looks like this.
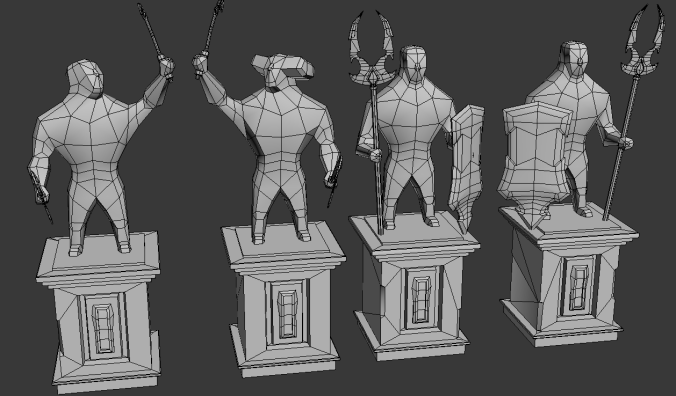
[ART] Enemy Meshes
We decided to swap the coloured capsule primitifs with meshes to create visual feedback for the player concerning the enemy interactions.
The visual feedback was done by swapping weapon and armour assets to be able to distinguish a difference between enemies. This was also done by playing with the sense of scale of certain enemies.
In the end all amour pieces and weapons will be able to be swapped out easily so that we’ll be able to create almost infinite amount of different enemies for varieties sake.
[DEV] Controls in-game
The Controls can now be seen in game, in case you’ve forgotten the key binding.
You can display the controls image by going to the Pause Menu (P), and clicking on the Controls button.
Currently, the Pause Menu does not yet have support for Controllers, but this will be added very soon.
This feature can later also be improved to have customizable key binds (this is just an idea at this moment in time).
[DEV] Settings Update
Previously, the only setting added was the Mouse Sensitivity. The value was just changed and saved in the Camera script, as it was only needed in there. Since the Camera was destroyed when switching or reloading Scene, the Settings would thus be reset to its default value.
To fix this, I introduced a GameManager singleton into the game, where settings and other values can be saved to, which can later be written to and loaded from a file, if necessary.
Other than that, the Slider also didn’t really give a good indication of what the Sensitivity value was, but we could not get rid of it due its handy slider feature. Therefor, I added an Input Field to the side, where the value of the slider is displayed, as well as where you can enter a value and the slider will update to that exact value.
[DEV] Skill Cooldowns
Every ability the player has learned has it’s own cooldown &
duration(only for teleport and hide).
The cooldowns and durations of each ability are calculated by the lantercomponents the player is equiping.
When the skill is in a cooldown period the UI-rectangle will be filled with a blue rectangle.
If the skill is active and in a duration period the UI-rectangle will be filled with a purple rectangle for teleport or a gray rectangle for hide, These rectangles will show how long the skill remains active.
[DEV&ART] Terrain, Visual updates and Door Lever
Door and Lever script updated with timer and open/close speed. Gate can also stay open forever and you can also adjust how long the door/gate stays open. 1 door/gate can support multiple levers(triggers)
A terrain was made in photoshop (heightmap) and then imported into unity.
Abilities where visual updated with particle systems to mimic light better.
The atmosphere was created by a snow particle system that follows the player and a 2D post processing global fog effect.
Lantern was also updated it now contains the meshes instead of placeholders. (same goes for lanterncomponents)
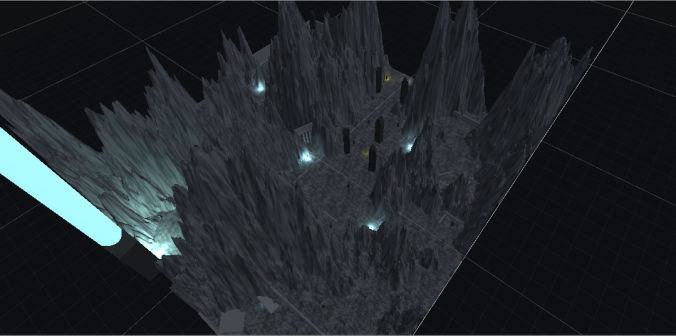
Picture of the terrain from sky. Blue lights representing the “guide” lights for the player.
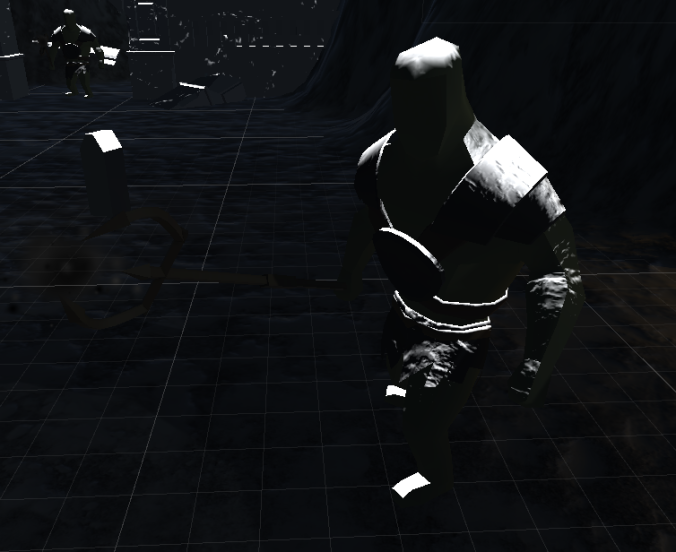
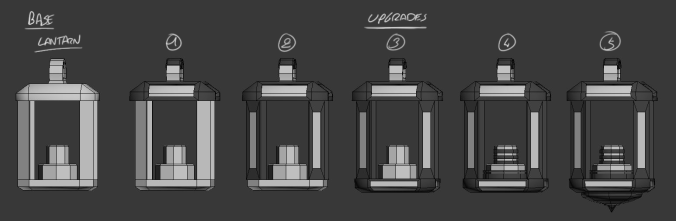
[ART] Updated Character & Lantern
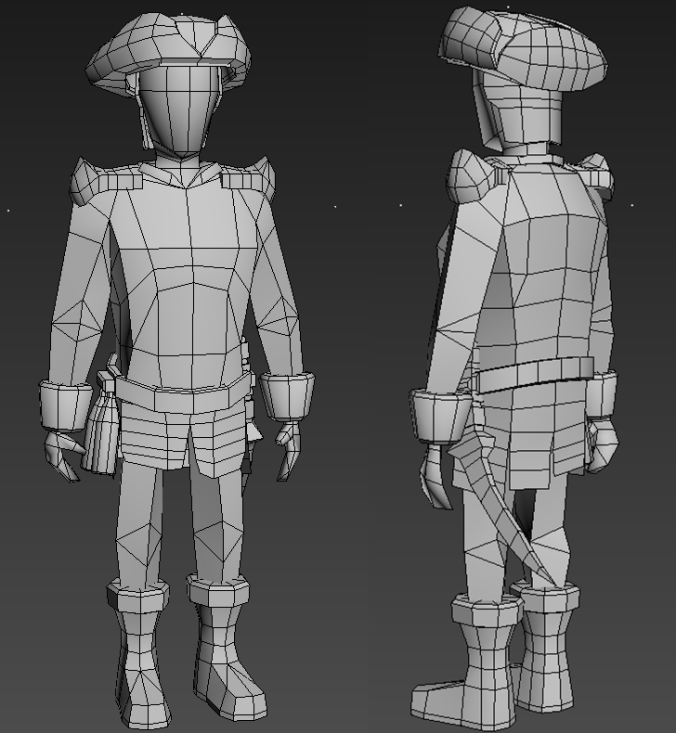
This week implemented our group our main character. (instead of the primitive capsule from the early prototype.)
The character itself underwent some cosmetic changes compared to previous iteration.

Another important aspect of the game is the lantern. It is the player hir main weapon of defence and attack.
The lantern will be fully custimizable and unlockable with in-game pickups.
The changes to the lantern are however not only cosmetic.
The following image shows a possible evolution of te standard lantern.
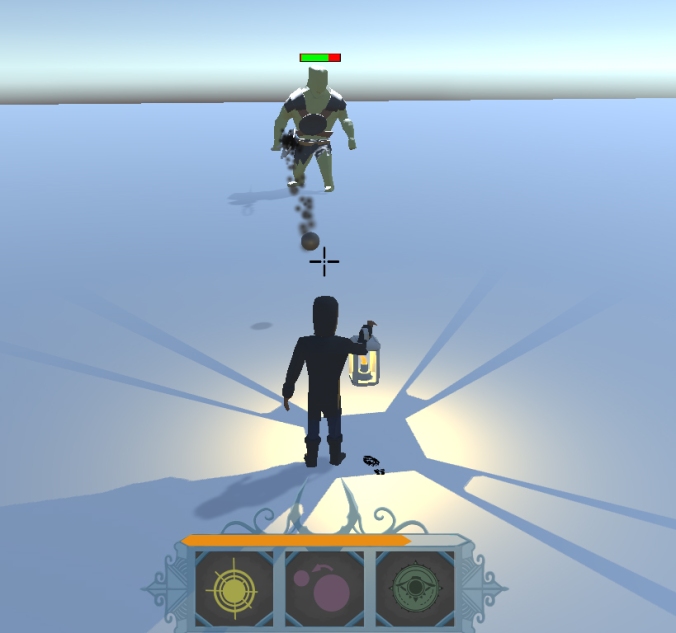
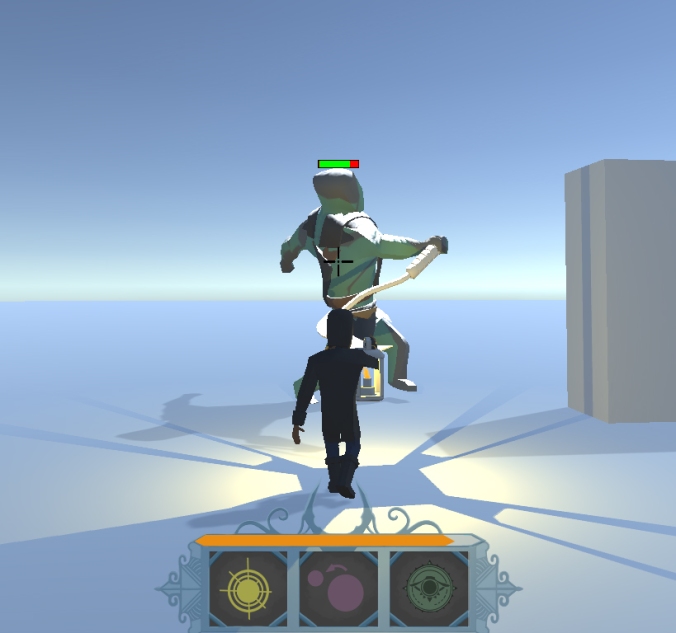
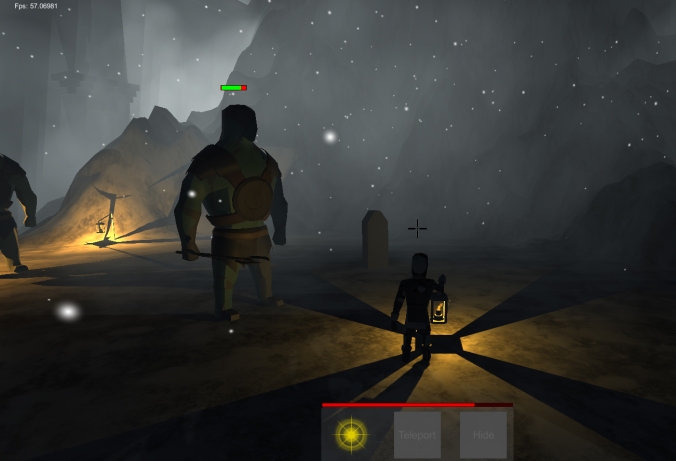
[DEV] Updated Enemies
Our enemy has gotten an upgrade, apart from some code rewriting, the enemy now has a healthbar on top indicating its current health and now fires a new projectile.
The enemy projectile is a dark shadow ball, the opposite of the players weapon the light ball. When hit the player will lose a portion of it’s health.
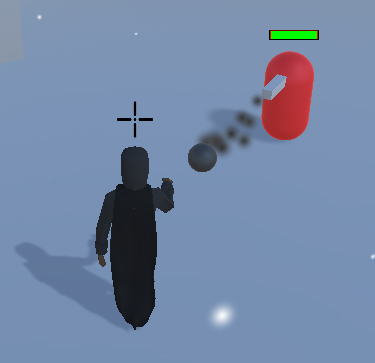
Apart from the long range attack the enemy now has the abillity to perform a melee attack at the player. When the player is in sight the enemy will charge at the player and chase him until he is in reach to attack. This attack will do more damage but the enemy has a delay between attacks. As seen in the picture the red enemy will fire projectiles while the other enemy is a melee attacker charging towards the player.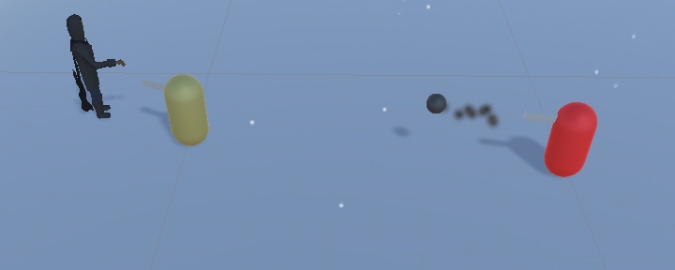
The enemy is now also more customizable, a variaty of settings ranging from the different behaviours, certain abillity’s, health settings, damage settings,… These variables let us create different types of enemies and can be expanded later on
The focus for now will be to improve the flow of the enemies, improve their behaviours and most importantly make sure they are optimised for the future.
[DEV] Camera Update 3
As mentioned by many, our Camera didn’t feel right for a Shooter Game. The smoothing made players nauseous, giving them a “Drunk Camera” feeling. Besides that, the sensitivity on our WebGL build was always too high since it didn’t match the sensitivity on our Standalone build.
Therefor, following changes were made:
Camera Movement
We got rid of the Smoothing calculations, making the response to your mouse instant. This should give the player a better experience when trying to kill the enemies or just looking around in the world.
Sensitivity
To fix the Sensitivity mismatch we could either release our builds with different Sensitivity settings, or be smart in the long run and make a Slider for the player do adjust to their preferences. Since everyone likes a different Sensitivity and plays differently, adding Settings to our Game would always come in handy.
To achieve this, I had to create a Pause menu that the Player can open using the ‘P’ key. This will also pause the game so that you’re safe from anything bad happening in game.
However, just adding the setting to the pause menu wouldn’t be very pretty, so instead I made a Pause Menu that has a Settings button, taking you to the Settings of our game. To make sure that nothing starts overlapping or blending, I had to make sure that the Pause menu was hidden when the Settings menu was open and vice versa.
Also we had to unlock the mouse whenever you open an interface that needs a mouse, such as the Inventory and the Pause Menu. Whenever you leave this interface, the mouse would have to get locked again. This is also a temporary fix because there currently is no way for the Controller to move the mouse or click buttons.
Learning Cutscene
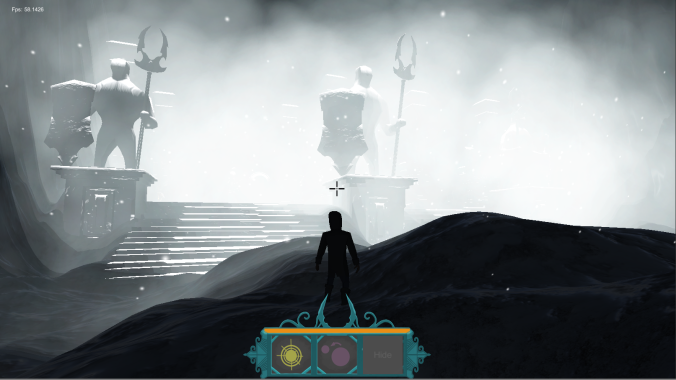
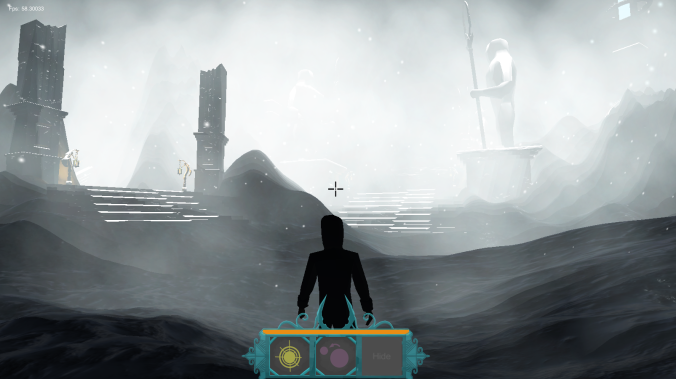
Learning an Ability sometimes looked awkward or not obvious, where the Player would be confused what was going on since he couldn’t move anymore. To make it more obvious what is happening, the Camera now moves to fixed point where you can see your Character looking at the stone. This should give the feeling of a small “Cutscene”, making the Player know that he won’t be able to move until he has learned the Ability. We can later make this even more obvious by passing the magic words on the screen, as if you’d be reading the spell on the stone.
The Position is a fixed point defined for each stone, which we can access in our script. Currently, the camera will always be facing the stone, but if needed, we can change it so that our Camera will follow the forward of the fixed point.
Prototype Final – Feb 28
[DEV&ART] ProtoLevel + New Movement
Last week the player was able to turn his character seperatly from the camera.
with the new movement this is no longer possible character looks where the mouse is and moves around using the camera’s forward direction.
To make our prototype clear Michael and I made a whole level to test all our mechanics.
See an overview in the pictures below.
[DEV] Inventory, Lantern Stats, -Parts and Door – Lever System
[vimeo https://vimeo.com/205949410]
Lantern Parts
U can now pickup different lantern parts. When the player is in range a text will appear letting the player know he can pick up the part. The player will then unlock the part and it will be added to the players inventory. (each part has different stats that will effect the player’s abilities)
Inventory
Player inventory consist out of the lantern parts(left side -> 5 slots) and the unlocked parts the player has found(right side). The player then can equip the parts by dragging it to a lantern slot. The lantern stats will change according to it (mesh will be added to the lantern mesh and also stats change) and they will be displayed(total lantern stats). Cant equip the same item twice.
Door – Lever system
Simple door – lever system, the player when in range (also with text) can activate a lever and a door will open. You can control which object and how fast it’s opening. This system will be expended with other features later on.(timer, closing, reactivating , …)
Lantern Updates
Lantern now flickers when the player is getting hit(take damage) and also pulsates when the player get health back from a health pickup.
[DEV] Improved Enemies
The player has the ability to learn how to hide. This stealth modus makes him invisible to bystanding enemies. Making it easier to avoid a battle.
When in stealth mode, the light of the lantern will go out for a small period of time, so the player has the change to get past a patrolling enemy.
This modus is not permanent so your timing has to be right or there may be a change you get spotted. To make things even more interesting some enemies will be immune to this modus so sneaking past them won’t be easy.
[ART] Character draft & style outline
This week we started to define the artstyle we’d like to use.
The following image is a first draft of our main character.

We are aiming to create a stylized ‘lowpoly’ world utilizing flat colours as textures.
More on this idea can be found in our Art Outline Document.
[DEV] Camera Update 2
We’ve decided to switch things around. Previously, our Player would rotate using Left and Right, and the Camera would follow that rotation smoothly. Since this didn’t fit the 3rd person shooter setting we were going for, we’ve now decided to do it the other way around. Moving your Mouse / Right Analog Stick will now rotate the Camera (this defines your Aim), and the Camera will rotate along so it faces where it wants to Aim to.
One of the many advantages is that we can now use Left and Right to move sideways, as well as that aiming is now easier and feels more natural.
[DEV] Aim
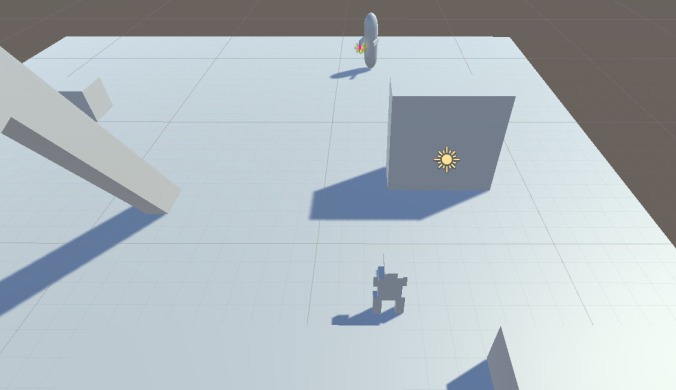
Since our Game has Light Bullets that can be shot from our Lantern, we needed a way to visualise the Aiming direction.
We’ve chosen to do this using a Crosshair on the middle of the screen as overlay. The current crosshair is just a temporary placeholder and can be easily changed into something more obvious or subtle, so that it fits our theme.
Calculating at which object you are looking was, however, a bit more difficult. We need to cast a ray starting from our player towards the direction of the camera, however, this would result in either having the crosshair on the back of our Player, or aiming below our crosshair if we move our Camera upwards.
To fix this, we cast a ray at the the position of our player but with this height offset kept in mind. This will give us the correct direction to cast the ray, which will then return the Collider you were looking at. This hit point can be used to then calculate the direction from the lantern, so our bullet can be fired towards the targeted object.
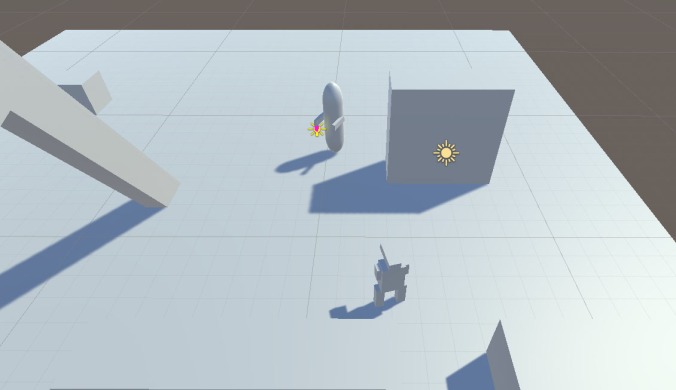
These directions can be visualised to debug. In the video below, the Red line represents the direction from the ray, while the Green line represents the direction for the bullet. The point where these lines intersect, should be the position of where your crosshair was looking at.
A final issue that came up, was when the Ray didn’t collide with anything (i.e. Looking at the Sky). We needed a default point somewhere in the distance to set as Target. Using the Far Plane of our Camera (The point where anything further won’t be seen, thus creating “sky” from this distance on) seemed like a good idea at first, but since the Far Plane didn’t match with the Distance that our bullets reached, I stepped away from using this.
Instead, I’m calculating the distance that a bullet can reach (lifeTime * speed) and set this as “far plane” (Note that this isn’t actually the Far Plane of the camera, but instead an imaginary plane with which the Ray will collide in case it hasn’t collided before).
This results in our bullet always reaching the crosshair position right before it vanishes due to its lifetime. This can also be seen in the video at the top, and in the debug view (second video) the lines will indeed intersect at the point where the bullet vanishes.
[DEV] Player
I was responsible for the Player itself and all the inputs.
the player has to communicate with the lantern and it’s stats .
The player can:
walk,shoot magic,teleport,putting new lanterncomponents & jump.
this is playable with keyboard and mouse or an extern controller.
a little video of what the player can do:
[DOC] Game Concept
Here you have the link to our Game Concept Document :
https://drive.google.com/open?id=1GTv2xcyhh4Z4kX3YfxNmCbpnw5DdoeX4AxXNd1r8DAI
[ART] Early concepts.
The following images contain early concepts of our game.
The player will spend a certain amount of time exploring to find all te pillars.
The following image represents a general layout of the playeable level in which the player will roam.
Key-elements are te different pillars linking up to a central hub which the player must try to disbale in order to escape.

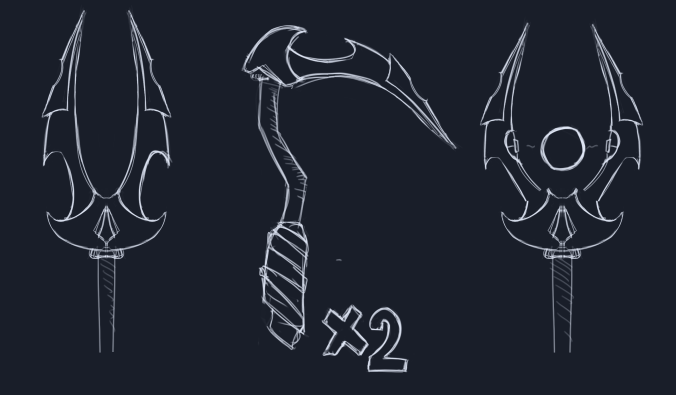
The following images contain ideas for emblems and weapons representing the enemy faction.
Note the recurring theme of tridents.

The following image represents a part of the main area.
Note the use of darker and grim colours to create contrast with our lightmecanics.
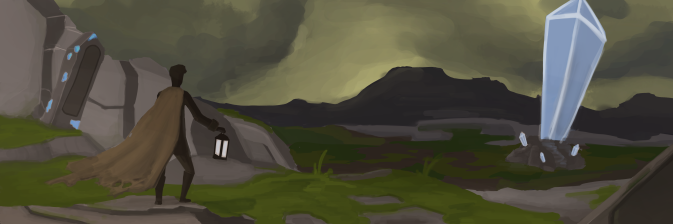
We are aiming to create an atmospheric experience for te player utilizing light and stylized environments. More on this will follow in the coming weeks.
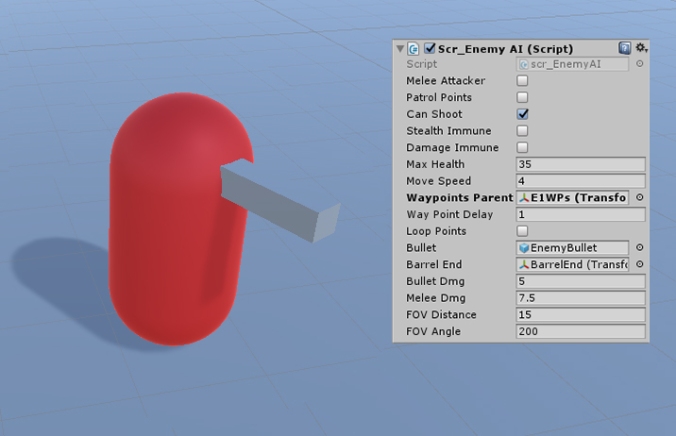
[DEV] Enemy AI
Enemy AI Small Demo Clip
Enemy’s will have the ability to patrol certain areas in order to make a stealth approach more difficult.
This waypoints system is made with a NavMeshAgent.
Checking if the player is visible or not by using a Raycast to see if objects are blocking the line of sight.
But first checking the distance between the player and the enemy.
If the player is within that visible range then check if objects, like for example a wall, aren’t blocking the line of sight.
The enemy’s Field of View is also limited, so use objects to get past them without confrontation.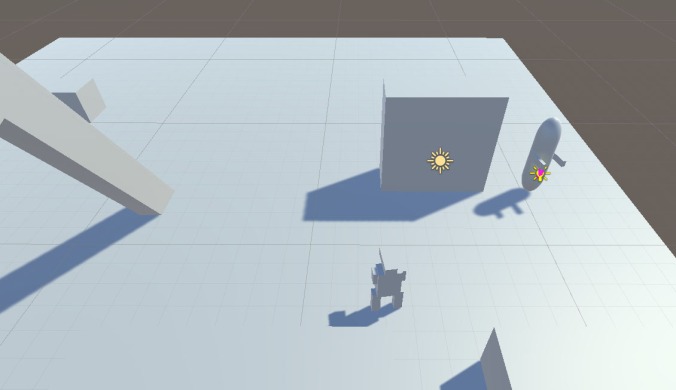
[DEV] Lantern Teleport Ability
[vimeo https://vimeo.com/204776171]
Teleport ability of the lantern. U shoot a projectile and if u activate the ability again u teleport to the projectile. If u dont reactivate the ability it will disappear after x amount of time.
[DEV] Lantern Swapping Parts
[vimeo https://vimeo.com/204776141]
The lantern will consist out of different parts which give different stats. The player can pickup parts in the world and use them to modify the lantern in appearence and the lantern stats.
[DEV] Lantern Abilities
[vimeo https://vimeo.com/204775642]
The lantern is the weapon of the game and also simulates the player health through light.(the less health , the less light the lantern emits).
The lantern has also a few abilities :
Turnoff light (stealth mode). Shoot Light and boost the light range.
Teleport(not implemented)
[DEV] Camera
We chose to add a Smooth Follow Camera to our Player, which can be rotated freely around the player, but will always follow the Player from a close to medium range distance.
The Camera can be controlled by holding RMB and moving the mouse around, or, preferably, by using the Right Analog Stick on your controller.
